

Working with neon lights in any 3D software demands special attention, especially when working with reflective materials.
Having said that, it’s quite easy to produce a neon effect in Cinema 4D, and, as I will show you, if added to a good construction of splines and typography, and finished in Photoshop, you can get a very interesting look. It’s important to observe the interaction between the real-life lights and the objects, so you can simulate the same effects on your material.
Cinema 4D has one of the friendliest interfaces on the market, so applying a neon light to a scene is simple. The material sets and the lights that illuminate the final scene will give a special touch to your project.
01. Creating the typography
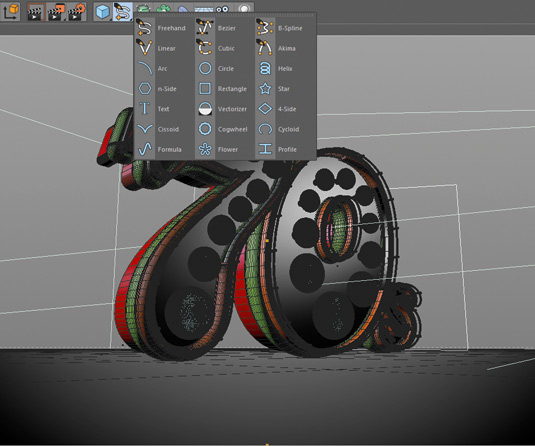
In Cinema 4D select Text on the top tool bar. Choose the size and style of the font, then type the text in the available space. The text will appear automatically on the main screen.
02. Get the neon effect
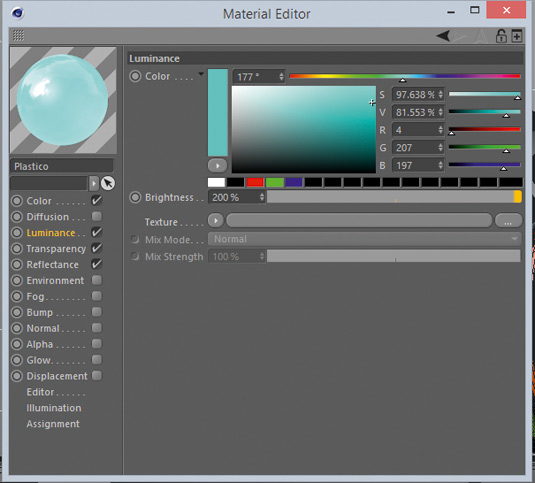
Go to Materials>New Material. Click on the material, activate the Luminance and set the Brigthness between 200 per cent and 600 per cent. Adjust the cursor for the colour you wish, viewed in the preview window.
On the material, go to Transparency and make the object 60 per cent translucent and 30 per cent reflective. Enable the Reflectance option.
03. Lighting the scene
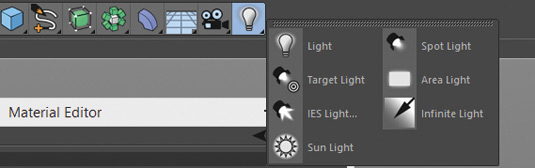
Go to the menu and add three lights to the scene. Using the three-point-light technique, set the lights. When setting up the lights, go to Type>Area to adjust the Intensity values to get the result you wish.
You can use another fill light, adjusting the parameters by clicking Shadow>Shadow Maps (soft) to diffuse the hard aspect generated from the other points of light.
04. Render Setup
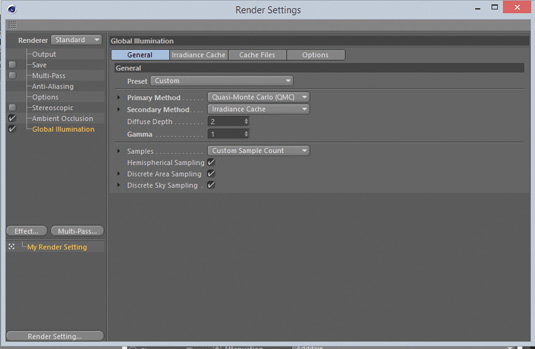
Use Ambient Occlusion and Global Illumination with the standard setup. Make a preview to check the light positions. Move the lights closer or further away from the typography to get the results you want.
Once the render is finished, open it in Photoshop and finish with some curve layers to highlight the colours and the glow.
By Christiano Piers


Leave a Reply