Part 1
Part 2
Part 3
Part 4
Part 5
Part 6
Part 7
Part 8
Modeling cars in Cinema 4D involves a combination of polygon modeling techniques, using reference images, and paying attention to details. Here’s a general guide to get you started:
1. Gather Reference Images:
- Collect reference images of the car you want to model. Side, front, and top views are crucial for accurate modeling.
2. Set Up Your Scene:
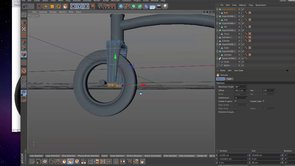
- Import your reference images into Cinema 4D and set them up in the viewport. Use the images as a guide for modeling.
3. Start with Basic Shapes:
- Begin with basic shapes like cubes and cylinders to create the main body of the car. Use the “Primitive” tools in Cinema 4D to create these shapes.
4. Create the Body:
- Extrude, scale, and manipulate the basic shapes to form the main body of the car. Pay attention to the proportions and contours.
5. Use the Knife Tool:
- The Knife tool can be handy for cutting and adding details. Use it to create openings for doors, windows, and other features.
6. Refine with HyperNURBS:
- Add a HyperNURBS (Subdivision Surface) object to smooth out the geometry and add more details. This will give your car a more polished and realistic appearance.
7. Model Details:
- Focus on modeling the smaller details such as headlights, taillights, mirrors, and handles. You may use reference images for these details or create them based on your knowledge of the car’s design.
8. Wheels and Tires:
- Model the wheels separately. Create the rims and tires using cylinders and other primitive shapes. Ensure they fit well with the car’s body.
9. Fine-Tune Proportions:
- Continuously refer to your reference images to fine-tune the proportions and shapes of your car. This is crucial for achieving a realistic look.
10. Create Interior (Optional): – If you plan to showcase the car’s interior, model the seats, dashboard, and other interior features. This step is optional, depending on your project requirements.
11. UV Unwrapping: – If you plan to apply textures to your car model, you may need to UV unwrap it to create a mapping for the textures.
12. Materials and Textures: – Apply materials and textures to your car. Use high-quality images for realistic reflections, and consider adding details like scratches and imperfections for authenticity.
13. Lighting and Rendering: – Set up lighting to showcase your car model. Experiment with different lighting setups and environments. When you’re satisfied, proceed to render your final image or animation.



Leave a Reply