

Learn to make cartoonish 2D-style illustrations in 3D using cel shading.
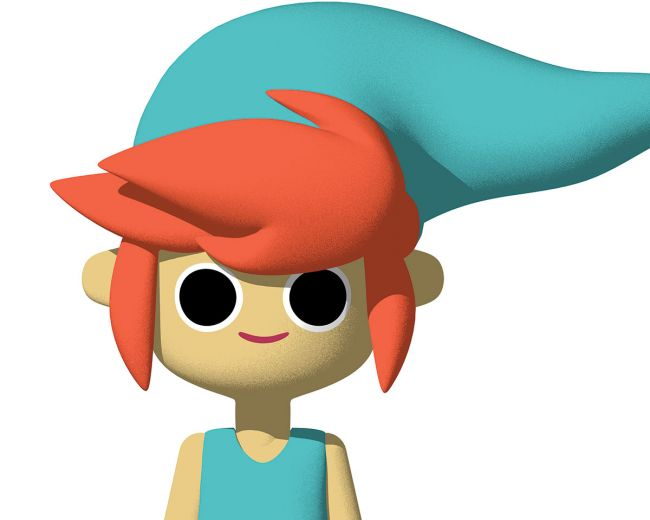
With the advent of mobile games and indie video games, there’s been a big influx of illustrators and animators getting into 3D art. This has created a trend of cel shaded objects in 3D space, bringing a whole new aesthetic, depth and dimension to 2D-style art. Thanks to this trend, a feature in Cinema 4D that has existed for years is now seeing a resurgence.
Using Cinema 4D’s powerful Sketch and Toon module, you can transform your 3D artwork into a cartoon-like illustration with just a few clicks of a button. The flexibility of the Sketch and Toon module lets you experiment with different 2D cel shading styles and have it react to lights in your scene.
Building designs or characters in 3D gives you greater flexibility, as you can simply rotate the object in 3D to turn the face, rather than using complex rigs. Simple things like this makes Cinema 4D a powerful app not only for 3D artists, but for 2D illustrators and animators as well.
- Add cel shader
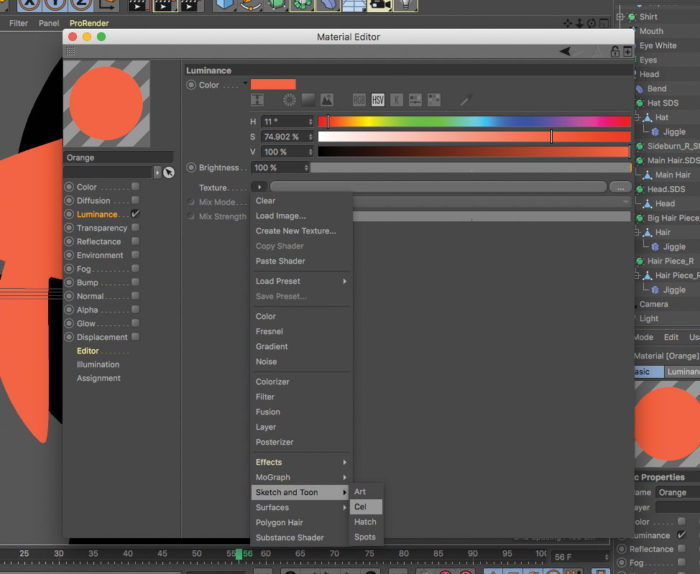
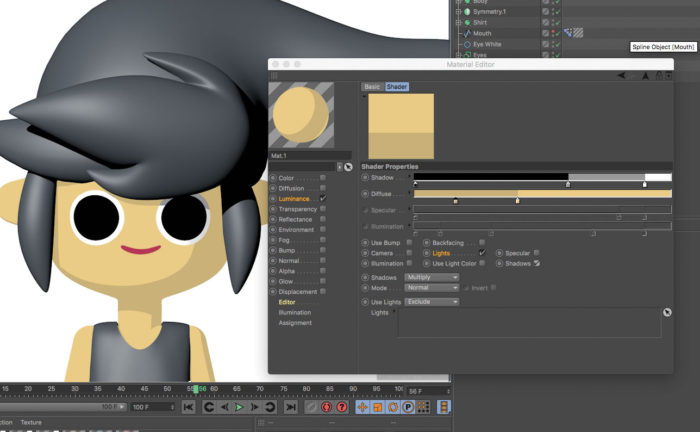
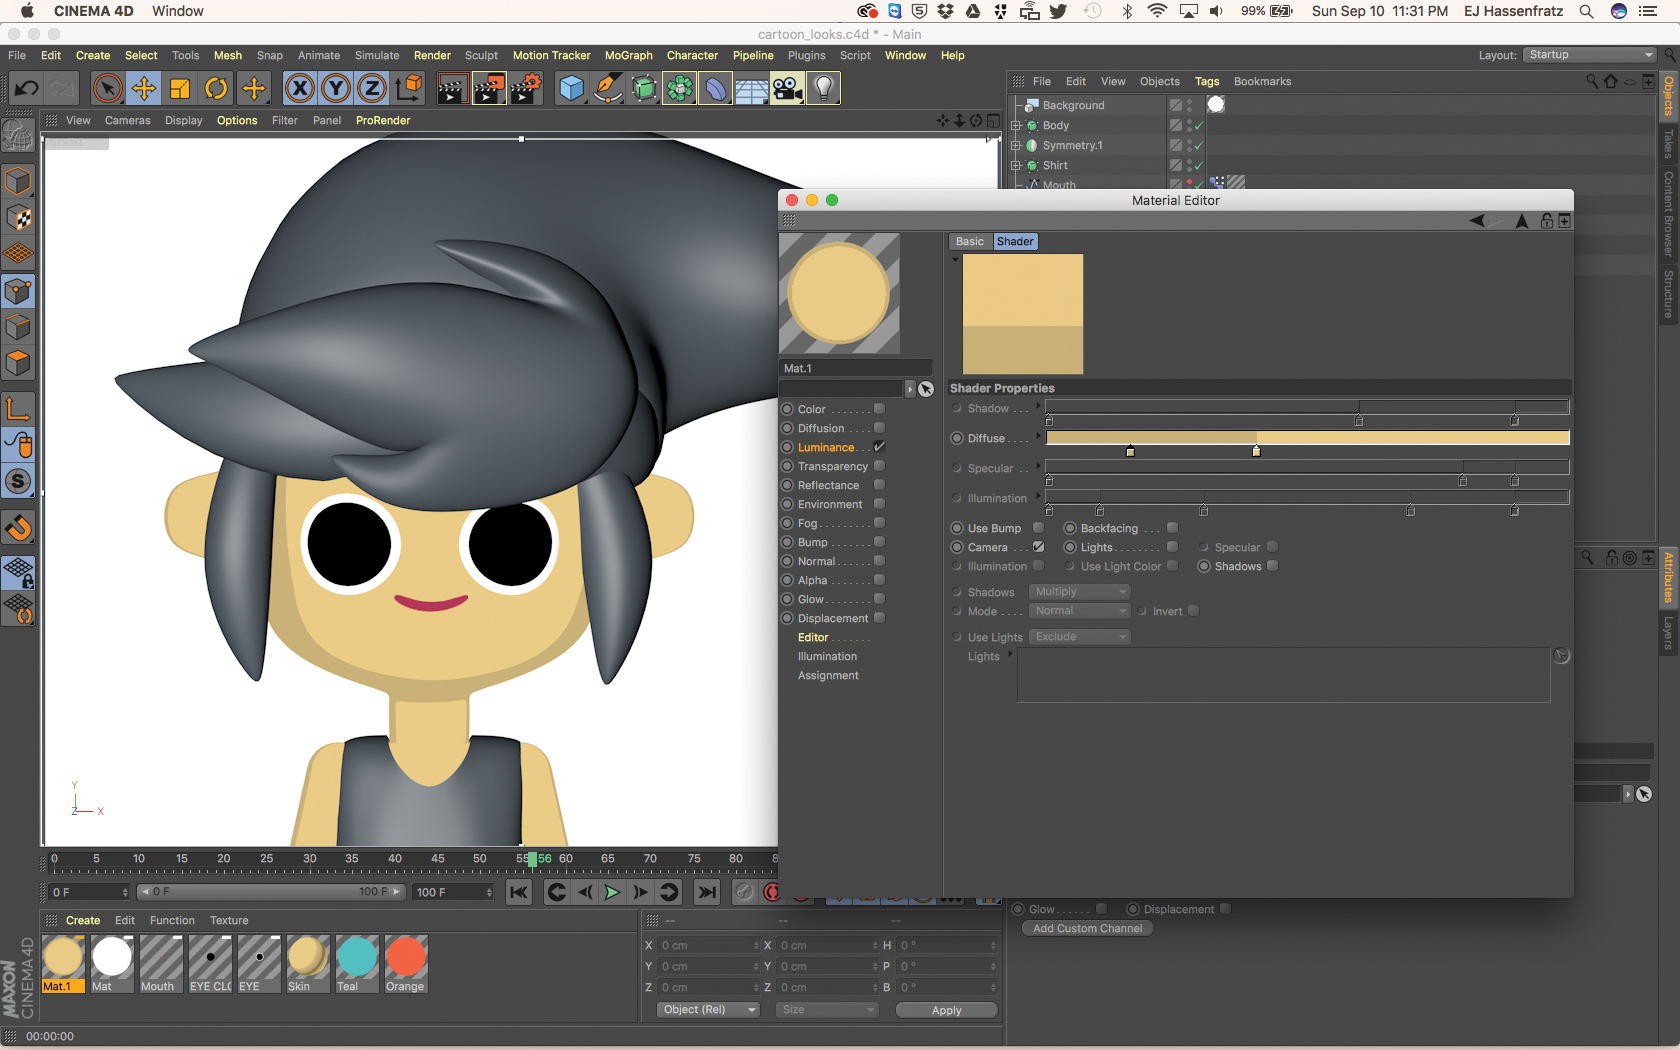
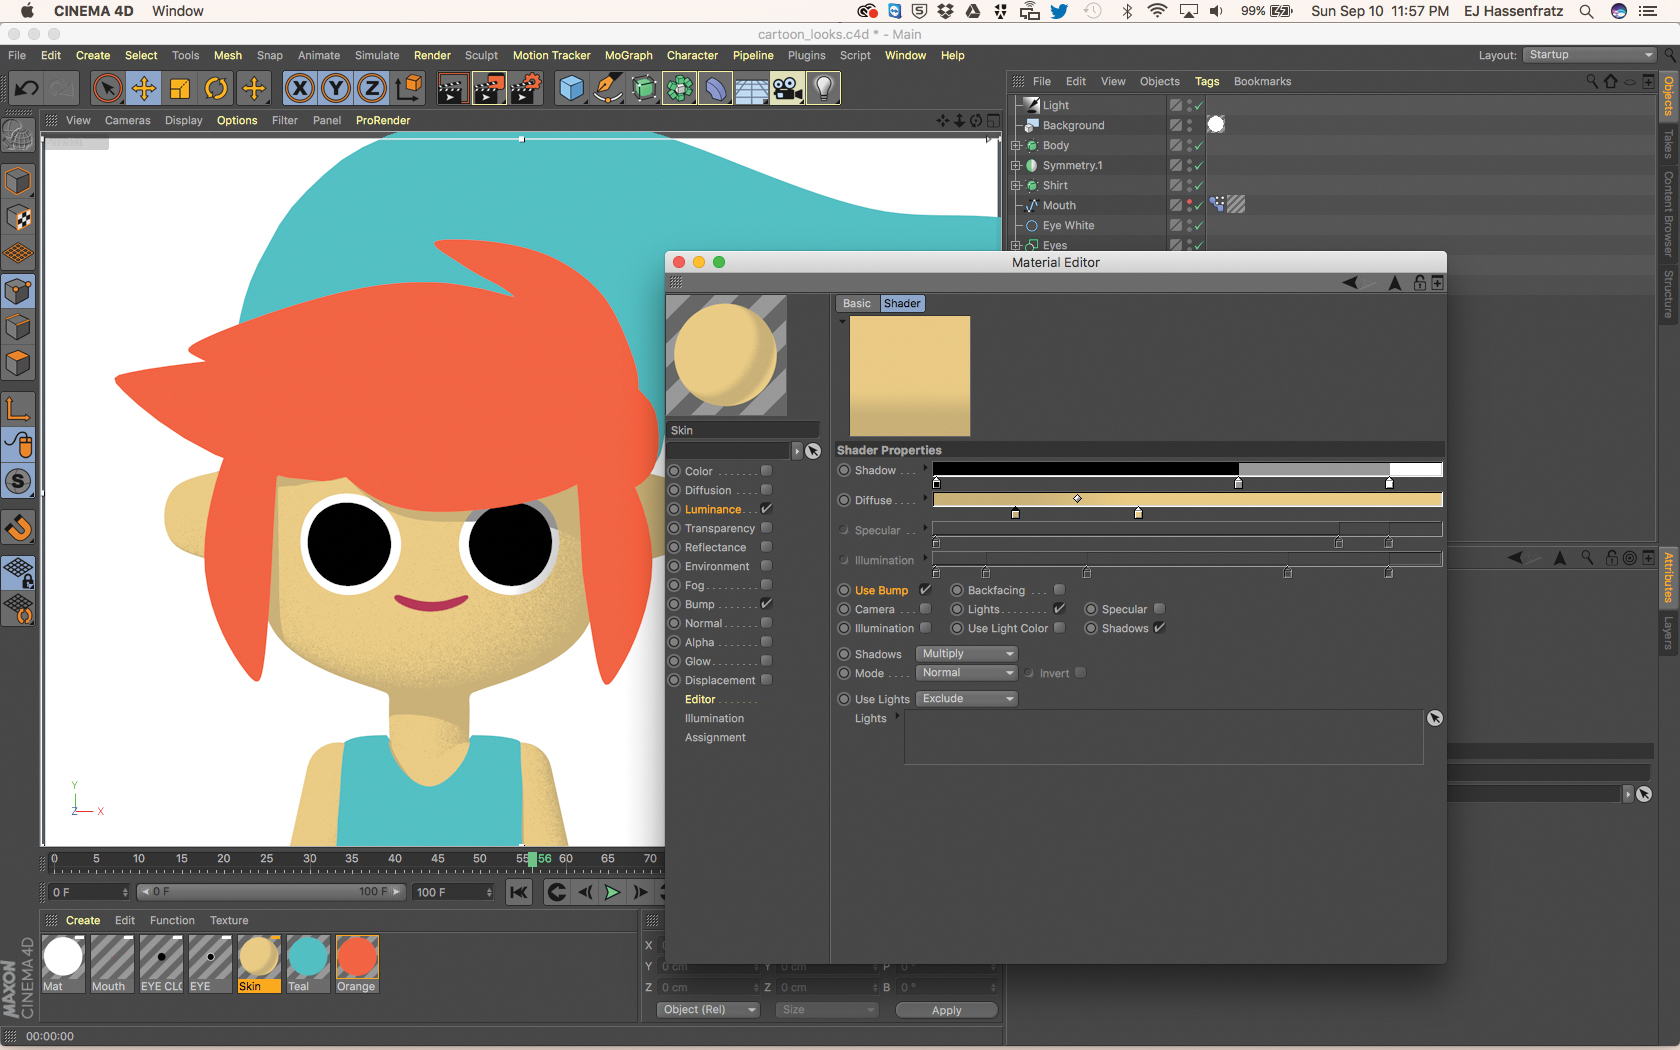
Begin by creating a new material to create the cartoon texture. Turn off both the Color and Reflectance channels. We’ll be using the Luminance channel because we don’t want any type of diffuse shading. We’re looking for nice flat shading for our model. Navigate to loading the cel shader into the Luminance channel.

- Choose your cel shading colours

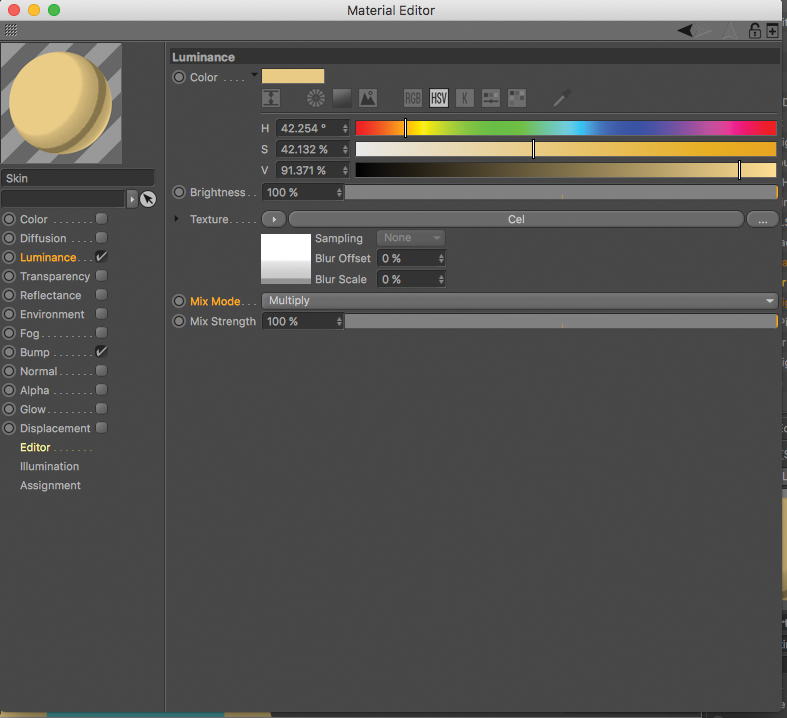
The cel shader works by using a gradient to apply materials across the surface of your object. The more you move a colour’s gradient knot to the right, the more of that colour will be represented on your model. You can add or remove colour chips to get the colour combination you like, whether tritone, duotone, or any other combination.
- Create a light
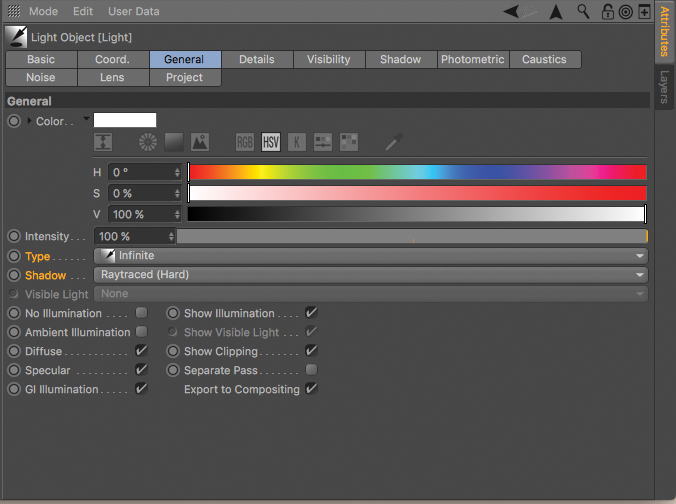
Let’s create an Infinite Light with Hard Shadows enabled for a cartoonish directional light and sharp shadows. Infinite Lights act like a massive light source, such as the sun. To change the direction that the light is being cast, all you have to do is rotate the Infinite Light.
- Use lights to drive cel shading
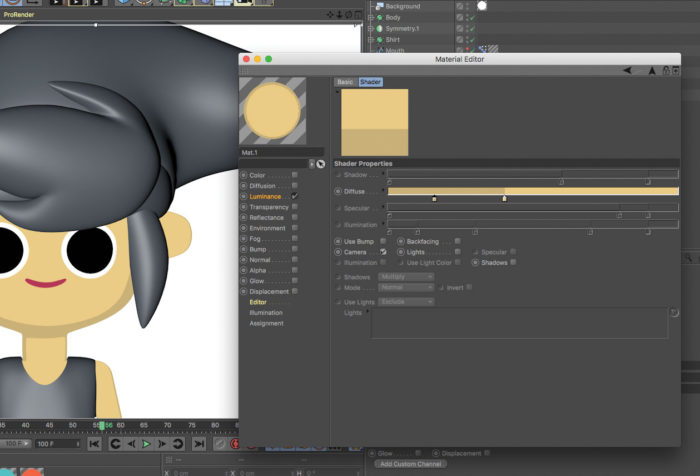
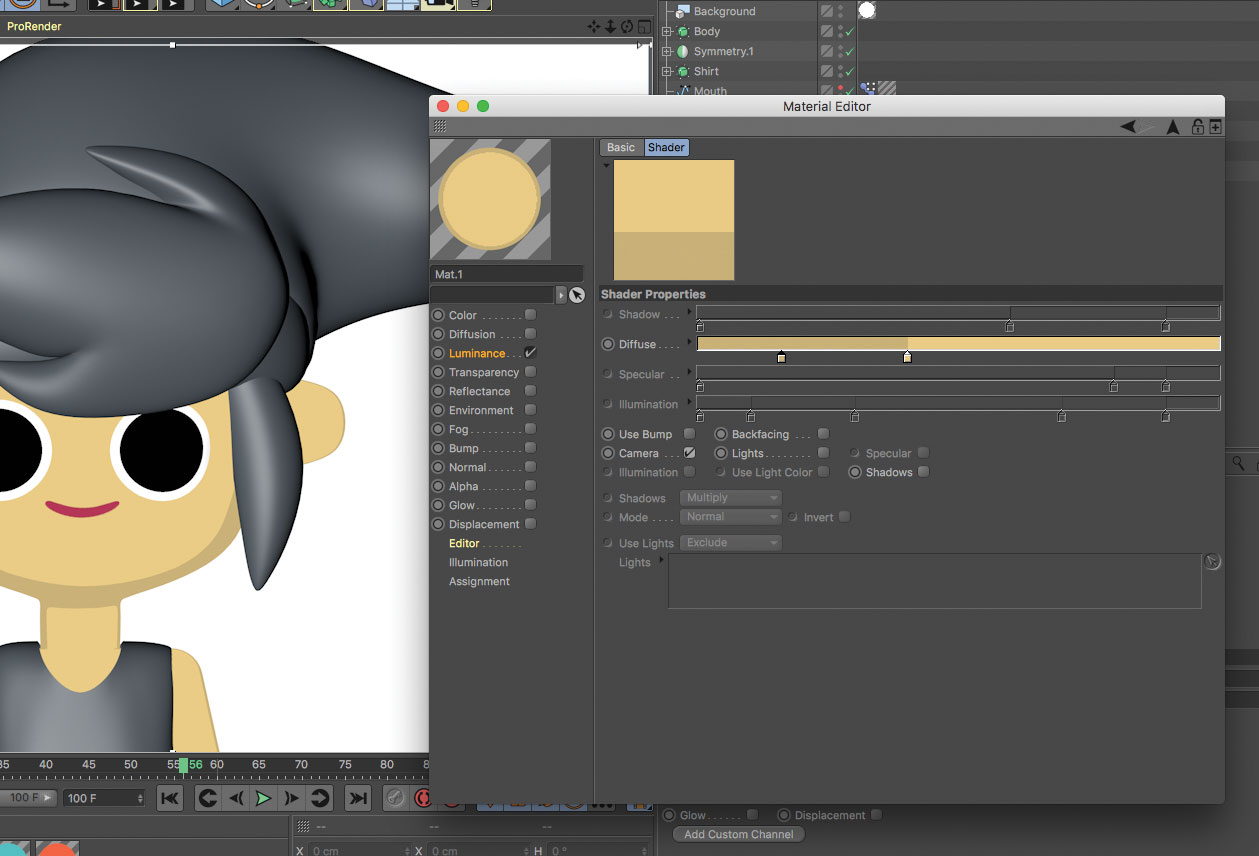
By default, the cel shader uses the camera or your default view as the point of the light source (Camera box checked on). To be able to use a light in your scene as the cel shader light source and to accept shadows, you just need to uncheck Camera and check on Lights as well as Shadows. Now you have total control over how the light is driving the cel shading across your object.

- Experiment with gradient interpolation
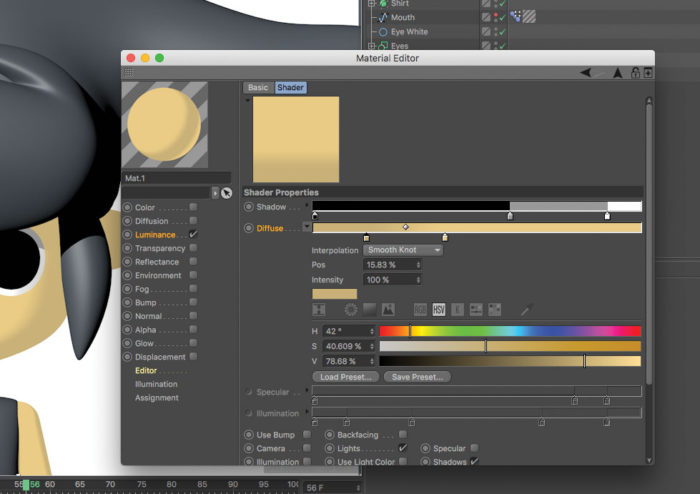
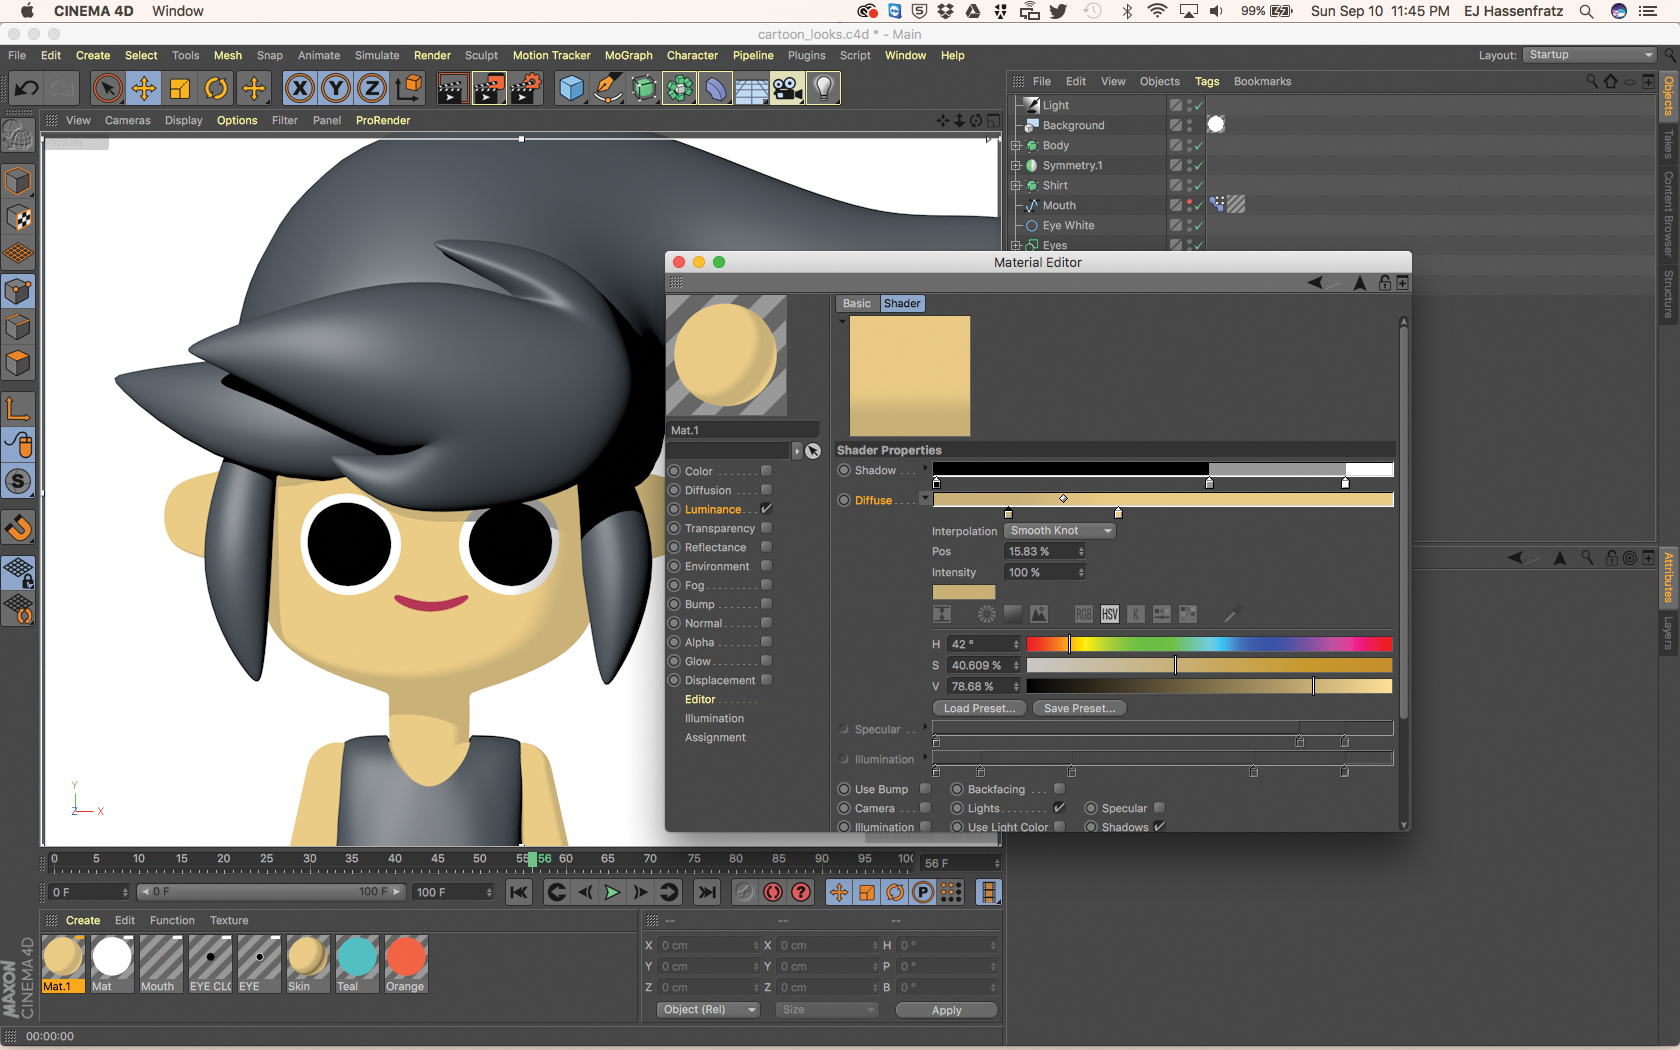
By using the different types of gradient interpolation by clicking on the arrow next to Diffuse, you can adjust how each colour blends into another one, and also discover some interesting stylised diffuse shading beyond just using no smoothing between each colour. For example, try adding contrast by spacing some knots closer together than others.

- Add stylised grain

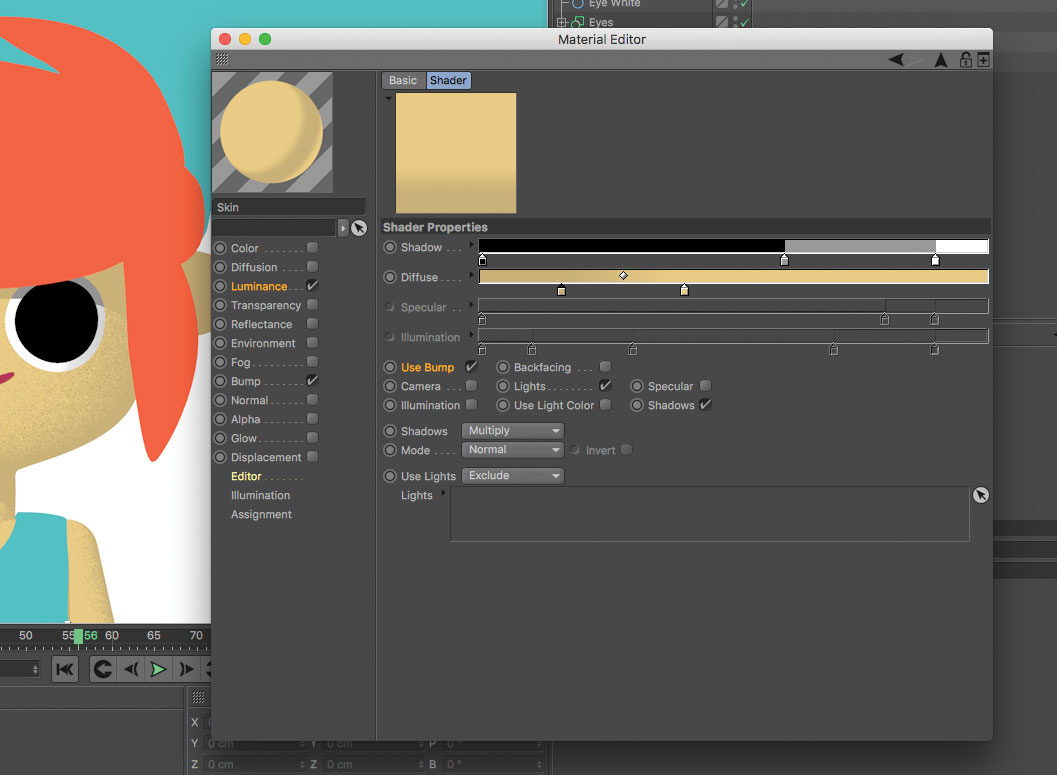
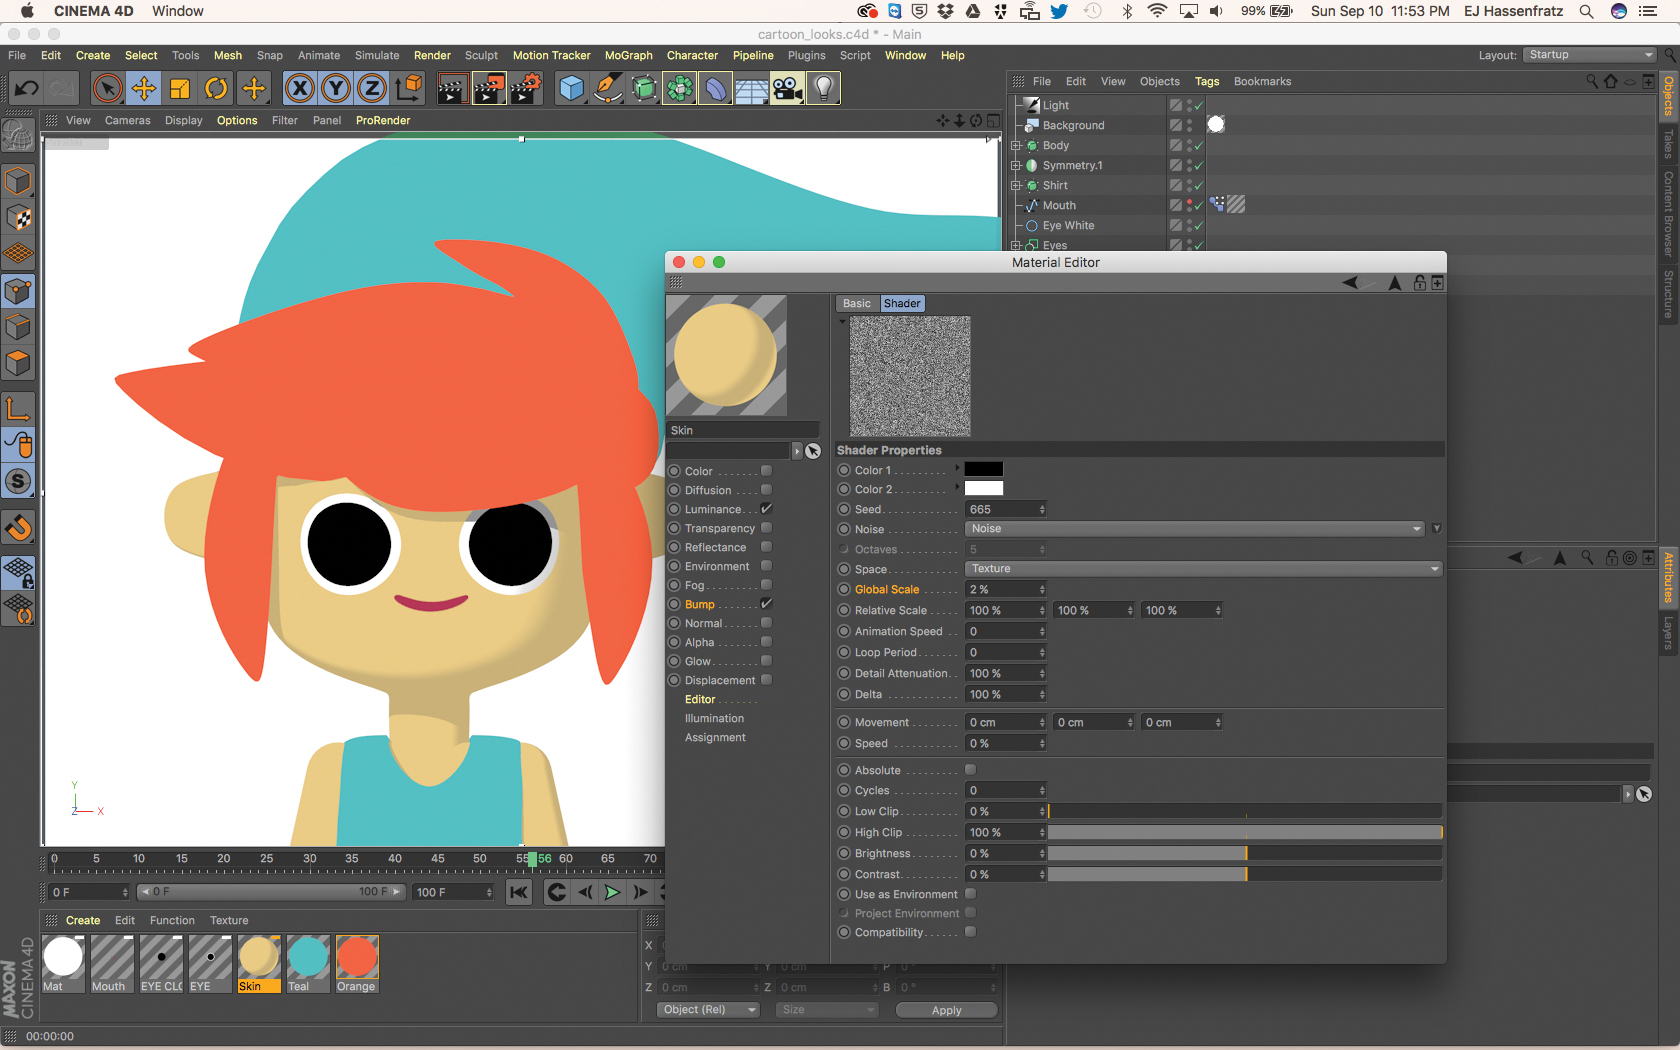
You can further stylise the look of your cel shading by using the Use Bump feature to add some grain. First of all, you must activate the Bump channel and load up a noise shader. Smaller noises work best for fine grain.
- Use Bump

For the Bump channel to act upon the cel shader, click the Use Bump checkbox. You’ll see the Bump channel breaking up the cel shader and adding stylised grain to your material. Experiment with the Bump strength in the Bump channel as well as different noise types.

- Render settings
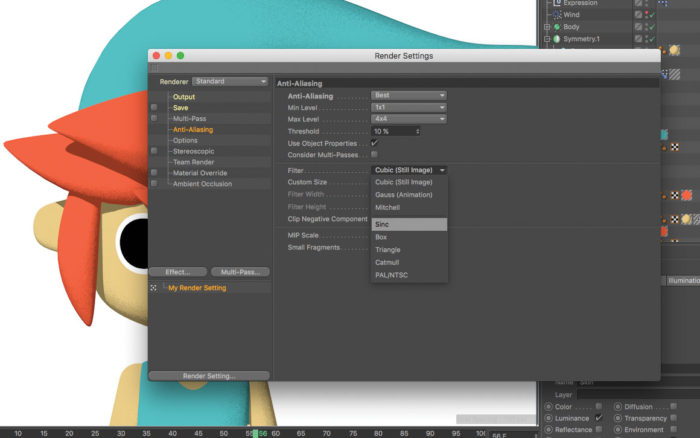
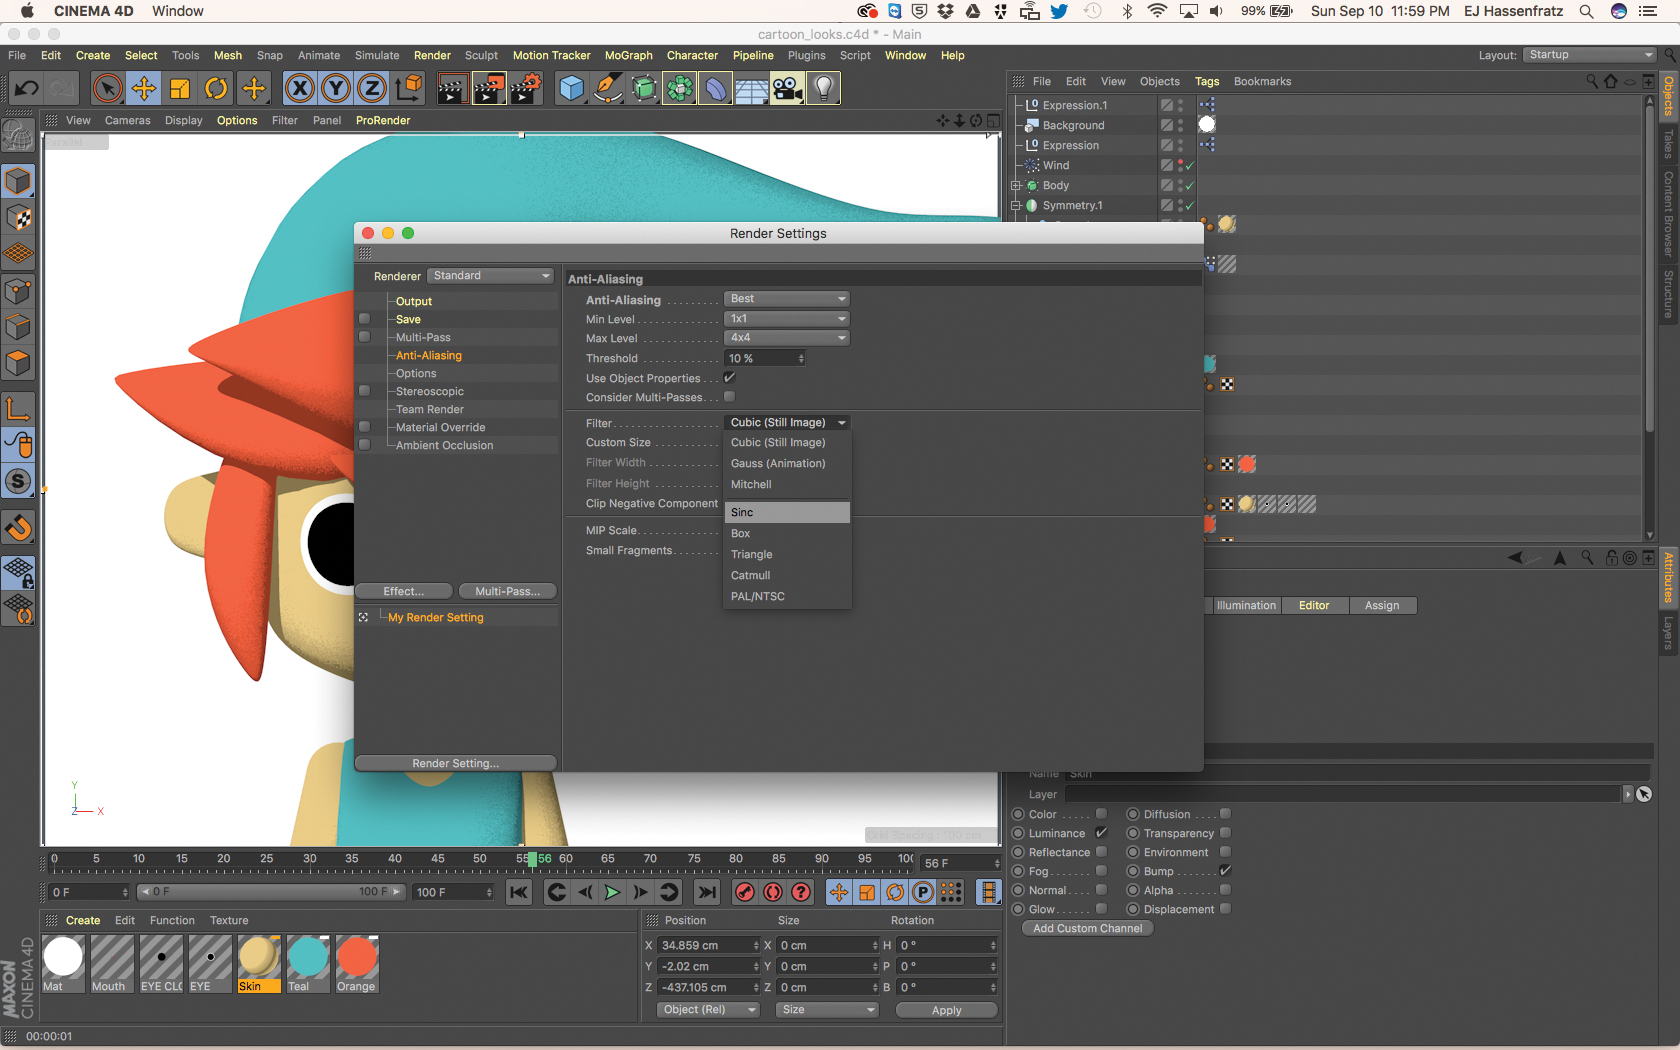
When rendering out cartoon shaded objects, it’s important to maintain a sharp, vector-like quality to renders, especially if you plan to composite the image in After Effects with vector layers. Typically you would render out using the Gauss (Animation) filter because it prevents flickering for some animation, but it also blurs your image. To maintain image sharpness, choose filters such as Cubic (Still Image) or Sinc.

by


Leave a Reply